
Gather the details you need
Before creating the invoice, have the following information ready:
- your business name and contact details
- your client’s name and address
- a description of the work, products or services
- the quantity and price of each item
- any tax or discount
- your payment details
- the date payment is due.
Check the rules that apply
Requirements can vary by country, industry and business type. Check the rules that apply to your business.
Add your business details
Enter the information that identifies the business issuing the invoice.
In IRQDocs, the Business details section includes:
- business name
- contact name
- address and country
- email and phone number
- Tax ID, VAT number or other applicable identifier
- optional business logo.
Signed-in users can select Save as my business defaults. Those details can then be added automatically when creating future documents.
Saving business defaults is an explicit action. Editing one invoice does not silently replace the saved profile.
Add your client details
Choose whether the client is a business or an individual, then add the relevant details.
For a business client, this may include:
- business name
- contact name
- address and country
- email address
- phone number.
For an individual, enter the person’s full name and applicable contact details.
Signed-in users can select a previously saved client rather than entering the same details again.
Add the invoice number and dates
Give the invoice a unique number that fits your record-keeping system.
Examples:
Example invoice numbers
INV-0012026-001CLIENT-104Also add:
- the invoice date
- the payment due date
- the currency used on the invoice.
Signed-in IRQDocs users may receive the next sequential document number when the number field is empty. Check the number before sending the invoice.
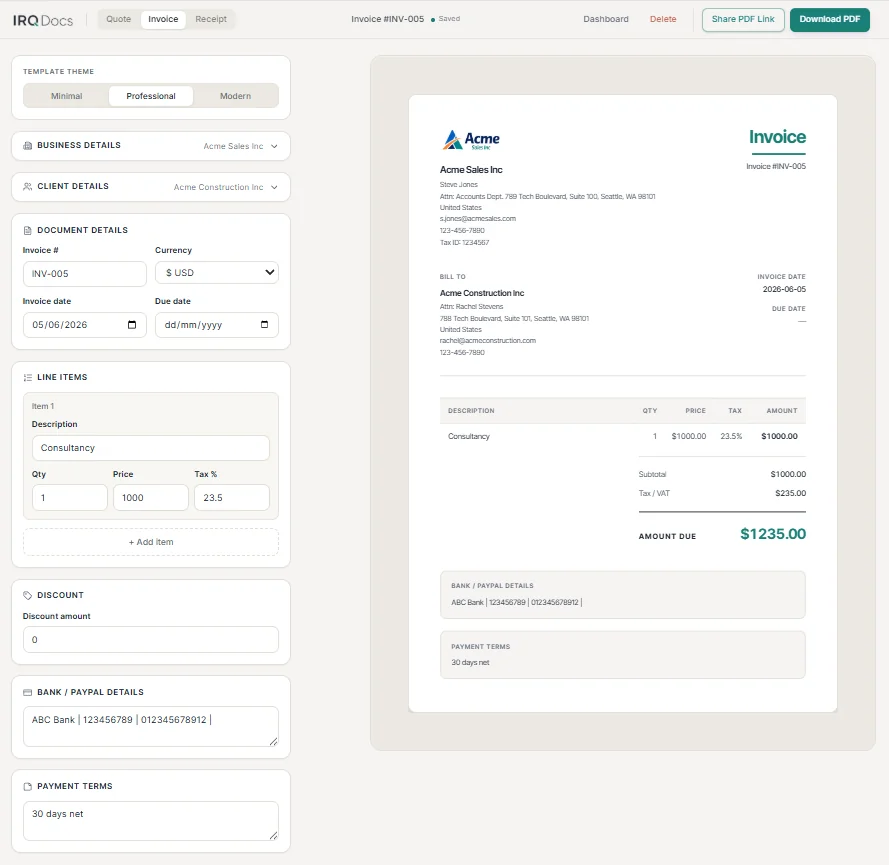
Add the work, products or services
Create a separate line item for each charge.
For every line item, add:
- a clear description
- quantity
- price
- tax percentage, where applicable.
Descriptions should be specific enough for the client to understand what they are paying for.
Example comparison:
Clearer
Website design and setup
Less clear
Work completed
Use Add item when the invoice contains more than one product or service.
Check tax, discounts and totals
IRQDocs calculates the invoice totals from the quantities, prices and tax entered for each line item.
You can also add a fixed discount amount.
Check:
- quantity
- price
- tax rate
- discount
- subtotal
- tax total
- final amount due.
Check prices and tax
IRQDocs performs the calculation, but you remain responsible for entering the correct prices and tax treatment.
Add payment details and terms
Tell the client how and when to pay.
Payment details might include:
- bank account information
- payment reference instructions
- accepted payment method
- payment deadline
- deposit or instalment information.
You can also use the notes or terms section for information such as:
- agreed payment terms
- project reference
- purchase order number
- late-payment wording
- a short thank-you note.
Protect sensitive information
Avoid placing sensitive information on an invoice unless it is necessary for payment.
Check the preview
Review the invoice before downloading or sharing it.
Check that:
- names and addresses are correct
- the invoice number is unique
- the dates are correct
- descriptions are clear
- prices and quantities are accurate
- tax and discounts are correct
- the total amount due is correct
- payment details are complete.
On smaller screens, use the Editor and Preview controls to move between the form and finished document.
You can also choose from the available template themes and confirm that the invoice remains easy to read.
Download the invoice as a PDF
Select Download PDF when the invoice is ready.

IRQDocs creates an A4 PDF using the details shown in the preview.
An account is not required to create or download the PDF.
Keep a copy for your records and send the finished invoice using your usual email or communication method.
If you are looking for a starting point, see the invoice template.
Save or share the invoice
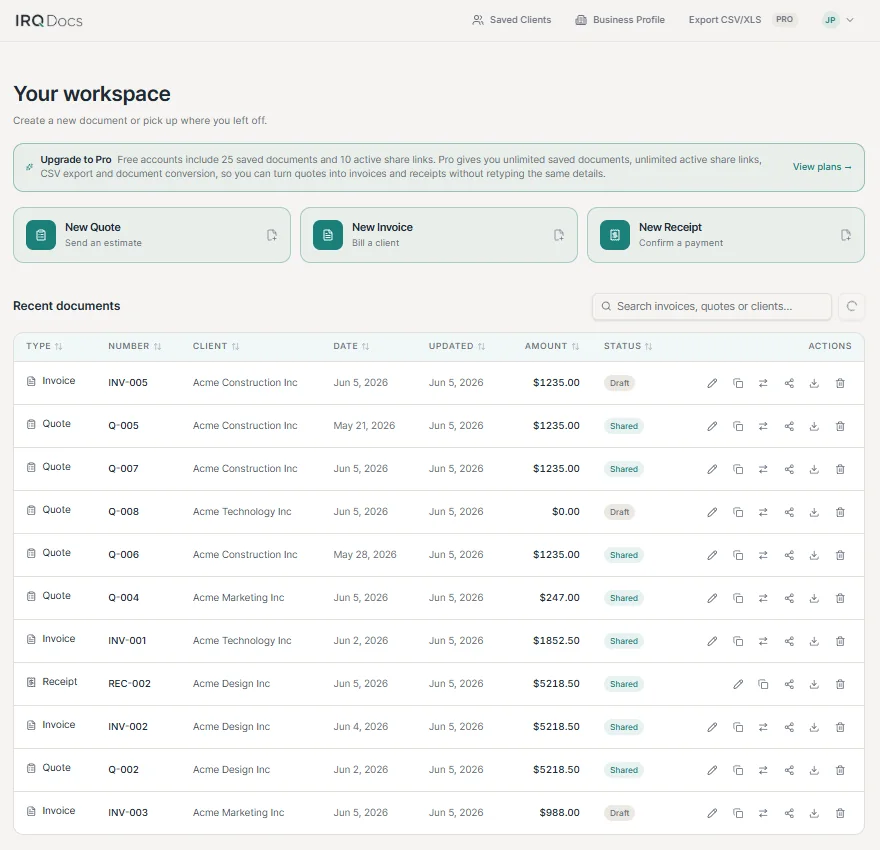
Signed-in users receive automatic saving while editing.
A Free account can be used to:
- save up to 25 documents
- keep up to 10 active share links
- reuse business details
- select saved clients
- return to documents through the dashboard.
A read-only share link lets the client view a saved document without an IRQDocs account.
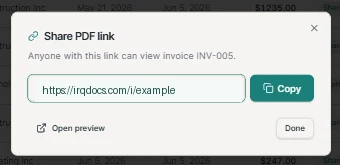
Anyone who receives the link may be able to open it, so send it only to the intended recipient.
Editing a shared document returns it to draft and invalidates the previous share link. Create a new link after checking the revised document.
What happens after sending an invoice?
Keep track of:
- when the invoice was sent
- the payment due date
- whether payment has been received
- any follow-up communication.
When payment is received, provide a receipt when appropriate.
IRQDocs Pro can convert a saved invoice into a receipt without retyping the client details and line items. Review the new receipt before sending it.